


In this tutorial we will show you how to install fonts on iOS 13. You will also learn where to download the new fonts and how to remove fonts from your iPhone or iPad.
Apple has introduced a new Font Management feature in iOS 13 that makes it easier for users to install and manage third-party fonts on their iPhone and iPad. Once installed the new iOS 13 fonts can be used in various parts of iOS as well as in third-party apps that support it.
iOS 13 Fonts have limitations
While you can use the new iOS 13 fonts in apps like Mail, Pages, Numbers etc they do not work with all apps. Right now popular apps like Microsoft Office apps and Google Docs lack support for iOS 13’s font management feature however we hope the support will be added soon.
It is also important to know the limitations of iOS 13’s font feature. Contrary to user demand Apple does not allow users to apply these third-party fonts as custom font for apps like Settings, Notes, Messages, home screen or lockscreen. You cannot use the installed fonts as your default system font for iOS as well.
You cannot install custom fonts downloaded from the web
Another major limitation of the iOS 13 font management feature is that you can only install fonts from font apps downloaded from the App Store. Currently there’s no way for users to download fonts from a website and install them through the Files app. We hope this changes in the near future as well and users are able to download fonts from non-App Store sources just like they can on their Mac.
Despite the options and support being limited for iOS 13 fonts feature we expect the feature to become more powerful in the future, especially when more font apps become available on the App Store. Support from third-party creative apps such as Photoshop will also make the feature more useful.
How to install fonts on iOS 13
Let’s start with the process and install fonts on iOS 13. On your iPhone or iPad running iOS 13.0 or later download the free Font Diner app. If you want more font options, then you can download the FondFont.
- Once the app has downloaded open it.
- As the app has launched you will be able to see all the fonts it includes. At this point tap on the ‘Activate’ button.

- From the slide up menu tap on ‘Agree’ option.
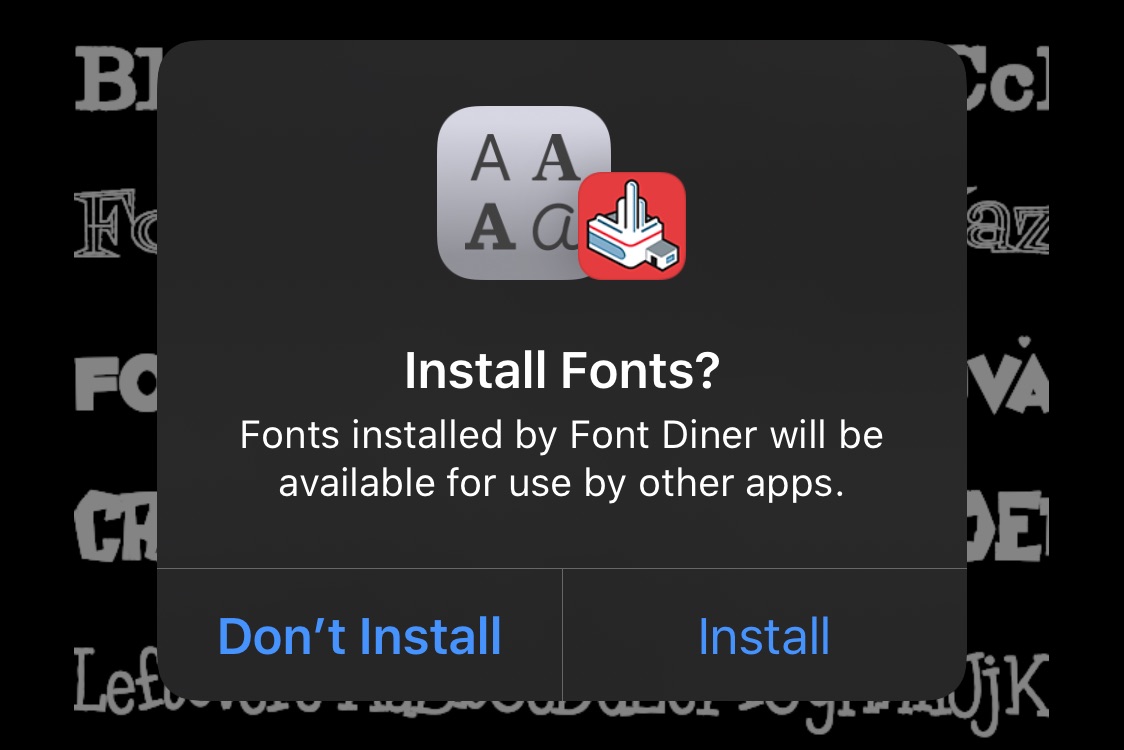
- Now you will be asked to confirm if you want to install the fonts. Simply tap on ‘Install’ option.

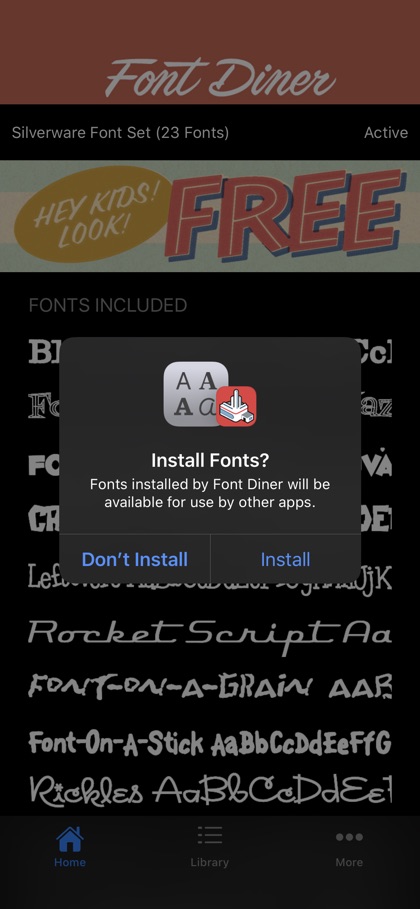
That’s it. All the fonts included in the Font Diner app have now been installed on your device and should be available to use in apps that support iOS 13 font management feature.
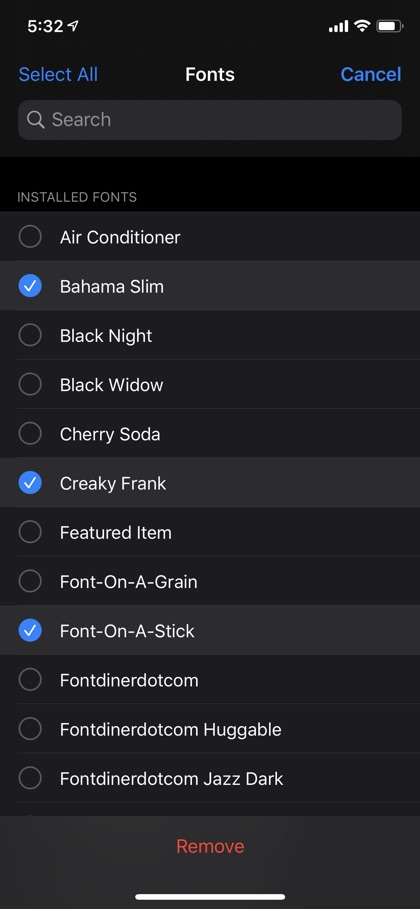
You can confirm this by going to Settings -> General -> Fonts. There you will find the list of all the third-party fonts that have been installed on your device.
How to remove installed fonts on iOS 13
Now that you know how to install fonts on iOS 13, there’s also the question of how to remove fonts from iOS 13. If you want to remove third-party fonts from your iOS 13 device, then you can do so by following a few simple steps.
- Open Settings and go to General -> Fonts.
- As you are on the Fonts screen tap on the ‘Edit’ button.
- Tap on the fonts you want to remove.
- Finally tap on the ‘Remove’ button from bottom.
You can also preview and remove individual fonts by tapping on the font’s name and then hitting the ‘Remove’ button from the next screen.
Using third-party iOS 13 fonts
As we mentioned earlier the support for iOS 13 fonts is limited at this moment however more and more creative and productivity apps will be adding support for this feature soon. Once an app supports the feature you will be able to select your installed fonts from the font picker of your favorite app.
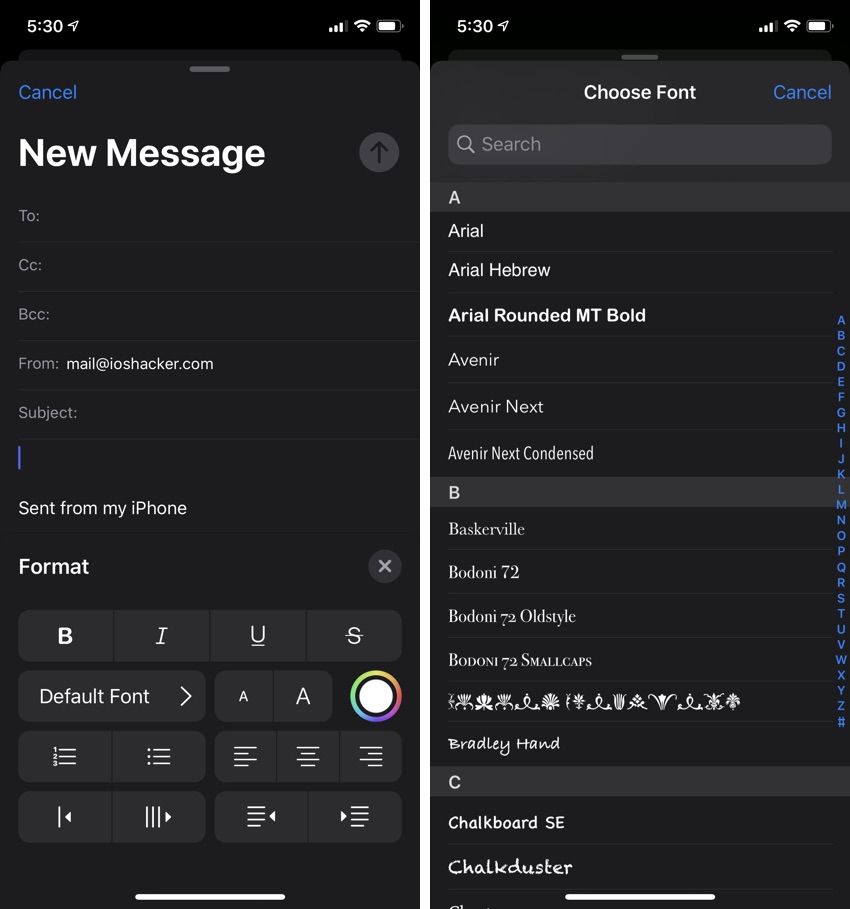
Using Fonts in Mail app
You can also use the third-party iOS 13 fonts in the stock Mail app, which is perhaps the only app that supports this feature. To use your custom font tap on the < button located on right side of the predictive bar and tap on ‘Aa’ option. Then from the Format menu tap on the ‘Default Font’ option and choose the font you want to use in your mail.
So there you go folks, this is how you can easily download and install fonts on iOS 13. In the second part of this tutorial you also learned how you can delete iOS 13 fonts from your device.
If you have any questions regarding this tutorial, then let us know in the comments section below.
Also read: How To Change Font Size, Access Reader View, Request Desktop Site In Safari


